No time for salon? Do facial at home to stand out this Karwa Chauth with these easy tips
As we look forward to celebrating Karwa Chauth 2022 with zest, here is a step-by-step guide to doing a facial at home easily. Follow this guide to enhance your glow this festive season.

The festive season is the time to invest in a proper skincare routine and get flawless skin that looks fresh and dewy throughout the day. A facial is not just skin deep, it also de-stresses the body and elevates mood. Karwa Chauth is coming, and everyone wants their skin to glow all day. While makeup products can help one look ravishing, they cannot match the beauty of a fresh face, and that is why people go to a salon to get a facial done. But, with so many festivals coming around, most people are busy with puja rituals, shopping, preparing sweets, and much more. Don't worry at all, because now you can pamper your skin by doing a facial at home with these easy steps. But first things first, we must know our skin type before indulging in any beauty treatment, so below we have explained skin types in detail.
In This Article
1. What is your skin type? Know it before doing a facial at home
2. How to do a facial at home? A complete step-by-step guide
- Homemade face scrubs for dry skin
- Homemade face scrubs for oily skin
- Homemade face scrubs for sensitive skin
- Homemade face masks for dry skin
- Homemade face masks for oily skin
- Homemade face masks for sensitive skin
- Homemade moisturizer for dry skin
- Homemade moisturizer for oily skin
- Homemade moisturizer for sensitive skin
10. Dos and Don'ts to be followed for at-home facial
What is your skin type? Know it before doing a facial at home
Using the wrong products can do more harm than good, hence, it is crucial to know the type of your skin so that you can determine which skincare products and/or skincare treatments would be the most beneficial for you.

1. Normal skin
In the world of skincare, normal skin type means that your skin has few or no imperfections. People with normal skin types have little to no visible pores and no severe sensitivity. But, even normal skin can experience issues like dullness or breakouts, so it is important to follow a CTM routine (cleansing, toning, and moisturizing) to keep things in check.
2. Oily skin
Oily skin is characterized by higher production of sebum. People with oily skin often experience acne breakouts, but the plus point of having this skin type is that your skin has natural oils to protect and moisturize itself. Oily skin may have large, visible pores, shiny complexion, blackheads, pimples, acne, and skin blemishes.
Oily skin ages better, so all you need to do is exfoliate your skin regularly to keep your pores clear and use non-comedogenic products.
3. Dry skin
Dry skin is the opposite of oily skin, as it produces less sebum. Due to the lack of sebum, the skin is not able to retain moisture and protect itself against environmental stressors. Dry skin may have pores that aren't visible, a rough complexion, less skin elasticity, visible lines, and red patches. Dry skin feels rough and tight, so using hydrating and nourishing products is best for this skin type.
4. Combination skin
As the name suggests, combination skin has characteristics of both oily and dry skin. Some people have an oily T-zone, and some feel dryness around their chin area and cheeks. For a combination skincare routine, one first needs to address the issue and then act accordingly. For example, if you have an oily T-zone, you can use facial packs specifically made for these areas. Or, if your chin area is more prone to dryness, you can address this issue by using a natural moisturizer.
Now that we have understood the different skin types, let us know about the tips to do at-home facials.
How to do a facial at home? A complete step-by-step guide

Facials are not just done as a part of beauty treatment, but also to relax your mind and body. Even at a professional salon, a facial is given in a relaxed atmosphere, so it is crucial to create a nice ambiance to get a spa-like experience.
First, create a clean and clutter-free spot at your home, then dim the lights, light some candles, and play calming music to help you relax.
Cleansing is an important step not just in a facial, but even in a daily skincare regimen. It helps clean the skin deeply and get rid of the excess oil, makeup, dirt, dust, and impurities that your skin encounters throughout the day. Not cleansing the face gives an invitation to various problems like dull skin, breakouts, fine lines, dryness, and so on.
So, cleansing is the first step of a facial. Use a gentle cleanser that suits your skin type to remove the excess oil and build-up from your face.
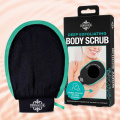
The next step in 'facial at home' is exfoliation. This step helps remove dead skin cells and gives an even tone to the skin. You can use a gentle exfoliator, or even prepare a face scrub at home. DIY face scrubs are an inexpensive way to minimize pores, get rid of dead cells, and get ultra-soft skin. It's amazing what kitchen ingredients like sugar, salt, coffee, and so on can do to our skin. Although homemade facial scrubs work great for the skin, one must use them according to their skin type. Moreover, people with sensitive skin or skin conditions should use facial scrubs cautiously. Make sure to not rub your face too hard as this can cause skin irritation.

Homemade face scrubs for dry skin
- Milk and brown sugar facial scrub
Take one tablespoon of milk, or fresh cream and add two tablespoons of finely ground brown sugar to it. Mix well to get a paste of smooth consistency and rub this gently on your face in circular motions. Avoid the eye area, and massage for about one to two minutes. Gently, remove the scrub from your face using a clean wet cloth. Finish the process by splashing cold water on your face to close the open pores.
Milk for the skin does wonders as it improves skin elasticity, nourishes the skin, and also protects it from UV rays. Brown sugar is a natural exfoliant that effectively removes dead cells and hydrates the skin. You can opt for this facial scrub to promote healthy skin.
- Yogurt and papaya face scrub
Cut ripe papaya into thin slices, and mash them properly to make a smooth papaya paste. Take a tablespoon of mashed papaya and add a tablespoon of fresh Greek yogurt to it. Apply this on your face and massage gently in a circular motion with your fingertips. Let it sit on your face for 10 minutes, and wash it off with cold water.
There are various benefits of papaya for the skin: it fights inflammation, and removes dead cells and damaged keratin from the skin. Use this scrub to get a papaya facial at home easily.
- Aloe vera and coffee scrub for the face
Take some pure aloe vera gel and add a tablespoon of coffee powder to it to make a fine paste. Massage this gently on your face and neck for one to two minutes, and let the pack sit on your skin for 5 to 10 minutes before washing it off with cool water.
Aloe vera soothes sunburns, gently exfoliates the skin, manages acne, and fades dark spots. Coffee, on the other hand, calms the skin, reduces inflammation, and provides after-sun care to the skin.
Homemade face scrubs for oily skin
- Tomato and sugar face scrub
Take a small tomato and take out its juice. Add one to two tablespoons of brown sugar to it and mix well. Scrub this on your face and neck area, and let the tomato-sugar scrub stay on your skin for five minutes. Rinse it well with cool water.
Tomato has astringent properties that cleanse the skin properly. Sugar, on the other hand, exfoliates the skin and leaves you with super soft, blemish-free skin.
- Honey and orange scrub
Take a tablespoon of orange peel powder and add a tablespoon of organic honey to it. Nox, mix a pinch of turmeric in it to get a grainy paste. Scrub this mixture gently on your face for one to two minutes, and then rinse the orange-honey scrub with water.
Honey keeps the skin moisturized and helps it look more radiant and youthful. Orange peel powder gets rid of blackheads, revives dull skin, and tightens skin pores.
- Coconut oil face scrub
Mix a tablespoon each of extra virgin coconut oil and sugar and give it a nice stir. Scrub gently for about two minutes and then wash this facial scrub off using lukewarm water. Then, wash your face thoroughly with cool water immediately.
The hydrating properties of coconut oil keep the skin nourished and moisturized. It is also packed with antioxidants that calm redness and fight inflammation effectively.
Homemade scrubs for sensitive skin
- Papaya face scrub
Take a few pieces of ripe papaya and mash them properly using a fork. Now, mix mashed papaya with a tablespoon of honey to form a smooth paste. Scrub this all over your face and neck for about two to three minutes, and then rinse this DIY scrub off with cool water.
This is one of the best facial scrubs as it hydrates the skin, removes blackheads, and exfoliates the skin gently. People with sensitive skin can prepare this easy-to-make facial scrub and do a facial at home easily.
- Oatmeal face scrub
Take a few pieces of ripe banana and mash them properly to form a puree. Now, mix a teaspoon of oatmeal with mashed banana along with 1/2 teaspoon of honey to soothe the skin. Massage this gently all over your face for a minute and rinse it off thoroughly with cool water.
For centuries, people have been using oatmeal for itchy, dry skin. It is suited for most skin types, even sensitive ones.
Oatmeal is used to soothe dry, irritated, and itchy skin. It removes dirt, oil, and dead cells from the skin gently.
Bananas hydrate dry skin, making it supple. They also ward off wrinkles, fine lines, and age spots.
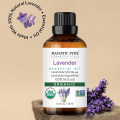
This is a crucial step in at-home facials and is simple to do. You can use a home face steamer tool, or if you don't have it, you can simply boil a small pot of water on the stove. When the water reaches a boiling temperature, turn off the heat, and allow it to cool slightly. Stand over the pot with a clean towel draped properly over your head, so that your face can feel the heat. Place your face at least 12 inches away from the water, and take the steam for about 5 minutes. Make sure to come up for air whenever you need to, and there should be no pain or discomfort at all during the steam process. For a spa-like experience, you can add a few drops of essential oils like peppermint oil or lavender oil to the water. This way, you'll get the experience of both facial and aromatherapy treatments. Don't worry if you don't have any essential oil because you can even steep herbal tea bags such as chamomile or peppermint tea in the water.
Steaming draws out impurities, opens pores, and softens blackheads so that it is easy to remove them.
After steaming your face, you can use a simple blackhead remover tool to get rid of them. Make sure to be gentle and not hurt yourself during the process.
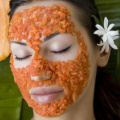
Whether you get a facial done at home, or you do a facial at home, the steps are all the same, and the next step is applying a facial mask. After your pores are open due to steaming, your skin can easily absorb ingredients. Pick a face mask that's tailored to your skin type. However, do not keep a facial mask for too long and remove it from your face while it is still moist to avoid dryness.
You can either use a store-bought facial mask or prepare one at home. Also, while the mask is resting on your face, you can pamper yourself with an eye treatment for a more relaxed experience. Cut a cucumber into thin slices and place two cucumber slices over closed eyes, and rest.

Below are some amazing facial masks recipes that can be easily prepared at home. All of these facial masks are to be kept on the skin for about 10 to 15 minutes, before washing the face.
Homemade face masks for dry skin
- Aloe vera and honey face mask
Mix two tablespoons of fresh aloe vera gel with a tablespoon of honey and apply this all over your face and neck area. Massage well and let the aloe vera-honey face mask stay on your skin for 15 minutes. Rinse it off with water.
Aloe vera has skin-rejuvenating properties and honey acts as a natural moisturizer. All in all, this is one of the best homemade face packs for dry skin.
- Cucumber face mask
Take two to three slices of cucumber and blend them (do not remove the peel). Add two tablespoons of aloe vera gel and three to four drops of rose water to it. Mix well and massage this on your face. Leave the cucumber face mask on for about 15 minutes and rinse it with water.
Cucumber hydrates dry skin, provides nutrients to your skin and calms irritated skin. Aloe vera gel nourishes the skin, and rose water is excellent to treat dry, scaly skin.
- Honey and curd face pack
Mix two tablespoons of curd with a tablespoon of honey and a pinch of turmeric. Stir well to make a smooth paste and apply honey and curd facial pack all over your face and neck. Rinse the honey-curd face pack off after 15 minutes.
The calcium and acids present in yogurt (curd) calm dry, irritated skin. Honey has skin-brightening properties and turmeric neutralizes free radicals which in turn treats dry, flaky skin.
Homemade face masks for oily skin
- Fuller's Earth (Multani mitti) and rose water face pack
Take a tablespoon of Fuller's Earth and add a tablespoon of rose water to it (you can add rose water according to your need). You can also add four drops of tea tree essential oil to the mixture for better results. Mix well and apply this as a face pack. Rinse it off after 12 to 15 minutes.
There are various benefits of Multani mitti for skin: it fades the appearance of dark circles, cools the skin, tackles pigmentation, and soothes skin rashes. Rose water calms the skin and provides hydration to the skin.
- Honey and oatmeal face pack
Mix a tablespoon of powdered oats, 1 tablespoon of rose water, and two tablespoons of organic honey together in a bowl, and apply this as a face pack. Rinse honey-oatmeal face pack off with cool water after 15 minutes.
Oatmeal boosts collagen production, prevents skin inflammation, and brightens skin. Honey provides nutrients to the skin, and rose water nourishes the skin by deeply penetrating the skin.
- Turmeric and neem face pack
Take a few neem leaves and grind them with some water to make a smooth paste. Add 1/2 teaspoon of turmeric powder to it. You can add some more water if the paste is too thick. Massage this gently on your face and let the neem face pack stay on your skin for about 15 minutes before washing it off with water.
Neem tackles blackheads efficiently and also lightens scars. Turmeric lightens hyperpigmentation and reduces dark circles. There are a plethora of benefits of this face pack for oily skin, so make sure to use it while doing a facial at home.
Homemade face masks for sensitive skin

- Cucumber and oats face mask
Take a small cucumber, peel it and blend it to get its puree. Add four tablespoons of oats and a tablespoon of plain yogurt to it. Mix well in a bowl and apply this on your face. Rinse this cucumber-oats mask off with cool water after 15 minutes.
Both cucumber and oats treat dullness, brighten skin complexion, and prevent acne. The moisturizing properties of yogurt keep the skin nourished and well-hydrated.
- Strawberry and honey face mask
Take three to four strawberries and mash them properly using a fork. Add a tablespoon of honey and yogurt to the mashed strawberry and apply this to clean the skin. Allow the pack to dry and rinse it off properly after 15 minutes.
Strawberry fades dark spots, controls sebum production, and protects the skin from UV damage. Honey lightens scars, and yogurt enhances skin elasticity.
These were the face masks you can prepare at home easily and do a facial at home without any hassle.
When you do a facial at home, do not forget to apply a toner after rinsing off your facial mask. Toners maintain the balance of the skin's pH levels and provide hydration to the skin.
You can use a store-bought toner, or prepare one at home yourself. Apply the toner using a clean cotton pad. Below are some recipes for preparing a toner at home.
- Green tea toner
Boil a cup of water and put a tea bag in it. Allow it to steep, strain, and allow it to cool. Use this as a toner.
- Aloe vera toner
Take two tablespoons of aloe vera gel and dilute it with a cup of cool water. You can also add two to four drops of tea tree essential oil to it for better results. Spritz this on your face.
Homemade toner for sensitive skin
- Cucumber toner
Take a cucumber and chop it into small pieces. Blend it to get its juice, and use this cucumber juice as a toner.
Cucumber is wonderfully calming for your skin and is water-rich which makes them great for nourishing. It reduces puffiness, and tones sagging skin.
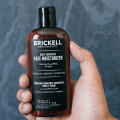
While doing a facial at home, do not forget to moisturize your skin. Applying a moisturizer helps heal dry skin and also slows the signs of aging. Opt for a moisturizer that's devoid of harsh chemicals and alcohol. If you wish to use a homemade moisturizer, you can try coconut oil, almond oil, or jojoba oil. Aloe vera is another natural moisturizer with healing properties.

Homemade moisturizer for dry skin
- Avocado oil
Avocado is an exotic fruit that has a lot of benefits for skin and hair. It is packed with vitamins and omega-3 fatty acids that work amazingly well for dry, flaky skin. Slather avocado oil on your skin and let it do its wonders.
Homemade moisturizer for oily skin
- Jojoba oil
Jojoba oil has a rating of 2 on the comedogenic scale, meaning it is less likely to clog pores. Moreover, it has humectant and emollient properties that makes it a wonderful ingredient for a natural moisturizer. Massage jojoba oil gently on your skin and say goodbye to all your worries.
Homemade moisturizer for sensitive skin
- Aloe vera
Aloe vera gel can be used as a face moisturizer for people with sensitive skin.
Note: Even natural ingredients can cause skin irritation, so it is always recommended to do a patch test before using home remedies.
Dos and Don'ts to be followed for at-home facial:
- Give your skin a chance to relax and rejuvenate. Don't wash your face the day you give yourself a facial at home for glowing skin.
- Avoid doing makeup for a day.
- Stay hydrated as this will help your skin get a fresh and smooth look.
- Do not indulge in deep exfoliation for a few days after getting a facial at home.
- Stay out of the sun for some time, if possible.
This was the step-by-step guide to doing a facial at home. Follow this at-home facial guide, and don't forget to eat a healthy diet and sleep well to get a ravishing glow this Karwa Chauth and uplift your spirits.
Also Read: Top 15 benefits of jojoba oil for skin, and ways to use it


 JOIN OUR WHATSAPP CHANNEL


