15 Natural Ways to Curl Your Hair Without Heat, Recommended by the Professionals
Looking for natural ways to curl your hair without using heat or chemicals? Wave goodbye to the damaging tools and get the perfect curls with these small effortless tricks.
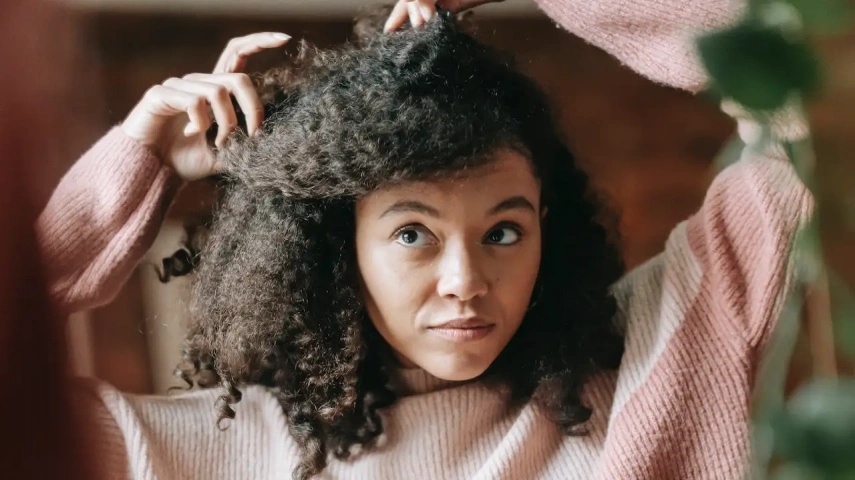
Curls on your hair are distinctive and make you feel special. Curly hair is flexible and can adapt to different types of hair textures, colors, and lengths. The process of curling with a curling iron and using heat on the other hand can be taxing and often leads to hair damage. If you are tired of curling your hair for hours with heating tools, we present natural ways to curl your hair without heat.
There are several ways to get gorgeous, bouncy curls without damaging your hair. From twists and braids to overnight methods, natural ways to curl your hair offer a variety of styles and textures to fit any occasion in addition to helping you prevent damage to your hair.
In this article, we'll go through 15 of the best natural hair curling techniques and demonstrate how you may easily get heatless curls.
The Science of Curls
The type of hair (curly, wavy, or straight) is determined by the shape of your hair follicle. A person with straight hair has a perfect circular follicle, one with wavy hair an oval follicle, and those with curly hair, possess an elongated oval-shaped follicle (1).
No matter how hard you try, achieving permanent curls is difficult if your hair texture is not curly naturally. Now, if any one of the parents has curly hair and the other has straight hair, there is more than a 50% chance that the child will have curly hair because it is considered to be the “dominant gene” (1).
How To Curl Your Hair Without Heat?
Women around the world have been curling hair for ages. Today, there are numerous heat-free options, the simplest being overnight damp hair braids. The other techniques include the lazy curls, the straw curls, and of course the roller ones.
With just a little bit of creativity, you could find the perfect heat-free method to achieve the curls you desire while keeping your hair healthy and damage free. So, here’s presenting 15 natural ways to curl your hair.
15 Natural Ways to Curl Hair Without Heat
1. Braids

One of the easiest ways to curl your hair is to get the beachy breezy waves at home.
This method is gentle on your hair and allows you to achieve a natural, effortless look without exposing your hair to damaging heat.
To curl your hair naturally with braids, you'll need:
- Comb
- Hair ties or scrunchies
- Mousse or curl cream
- Start with clean, dry hair. If your hair is wet, it will take longer to dry and the curls may not hold as well.
- Part your hair down the middle or to one side, and separate it into sections.
- Apply a styling product to each section of hair to help define the curls. Mousse or curl cream are good options.
- Create a French braid or a regular three-strand braid in each section of hair, starting as close to the scalp as possible.
- Secure the end of the braid with a hair tie or scrunchie.
- Repeat the same in other parts of the hair.
- Leave the braids overnight, or for at least 6-8 hours.
- In the morning, carefully undo the braids and finger-comb your hair to separate the curls.
- Apply a light-hold hairspray to set the curls in place.
Braids are a great natural way to create curls that can last for several days. You can experiment with different types of braids, such as fishtail braids or Dutch braids, to create different curl patterns.
2. Twist and Pin

This one is a simple and effective way to curl your hair naturally with extra bounce. Start with twisting small sections of your hair and pin it up as you move on to the next sections. This one gives you perfect tight or loose curls, depending on the size of the sections you choose.
The twist-and-pin method is a simple way to create natural curls without heat. You'll need:
- Bobby pins
- Hair ties
- Mousse or curl cream
- Wet your hair with a water spray or can be done after just washing your hair.
- Part your hair into sections as per your comfort.
- Apply a styling product to make the curls stay longer.
- Start twisting one section of your hair on your index finger.
- Coil the twisted section and secure it with a bobby pin as you reach the scalp.
- Repeat the process for all sections of hair, twisting and coiling in the same direction to create uniform curls.
- Leave the twists in for at least 6-8 hours, or overnight.
- In the morning, carefully undo the buns and finger-comb your hair to separate the curls.
- Apply a light-hold hairspray to set the curls in place. You can also apply a small amount of oil or serum to add shine and prevent frizz.
.3. RagCurls

Have some old tees at home? Try this rag curl method for fine tight curls without heat. This technique might demand some extra effort but definitely, the curls last longer than others.
For this method you'll need:
- Strips of fabric
- Hairpin
- Hair ties or scrunchies
- Mousse or curl cream
- Cut or tear strips of fabric into long, thin pieces. You can use old T-shirts or rags for this.
- You can apply any styling product if you wish so, it may help the curls stay longer.
- Take a small section of hair and wrap it tightly around one of the fabric strips, starting at the ends and rolling upwards towards the scalp.
- Tie the ends of the fabric strip together to secure the curl in place. You can also use a hair tie or scrunchie to secure the curl.
- Repeat the process for all sections of hair, wrapping in the same direction to create uniform curls.
- Leave the fabric strips in for at least 6-8 hours, or overnight.
- In the morning, carefully undo the fabric strips and finger-comb your hair to separate the curls. You can also use a wide-tooth comb or pick to gently loosen the curls.
- Apply a serum for the perfect shiny look.
4. Headband Curls

Want a natural and easy way to curl your hair? Headbands got you covered. If you have naturally wavy hair, this method will give you an extra oomph and make you look gorgeous with just the right bohemian look you aim for.
To get natural curls using the headband curl technique you'll need:
- Headband
- Hair ties
- Bobby pins
- Mousse or curl cream
- Place a stretchy headband around your head, over the top of your hair. Make sure it's comfortable and snug.
- Take a small section of hair and wrap it over and behind the headband, tucking the ends in behind the band.
- Repeat this process with all sections of hair, wrapping in the same direction to create uniform curls.
- Once all hair is wrapped around the headband, secure the ends with hair ties or bobby pins.
- Leave the headband in for several hours or overnight.
- Carefully remove the hair ties or bobby pins and unwrap the hair from the headband.
- Finger comb your curls to separate them and add volume. Apply a light-hold hairspray to set the curls in place.
5. Flexi Rods

This one will give you super-defined curls. But, if you don't follow the steps mentioned below to the-T you might end up with a not-so-ignorable mess. Also, no matter what your hair type is, this one can be used for wavy, straight, and loose curly hair too!
Flexi-rods are versatile tools that can create a variety of curl patterns in all hair types. You'll need:
- Flexi-rods in the size and shape of your choice
- Hair clips or bobby pins
- Styling products such as mousse or curl cream
- Start with just washed hair using volumizing shampoo.
- Apply a styling product to each section of your damp hair in case you have a straight hair type.
- Now take a small section of hair (for tighter curls) and wrap it around the flexi rod, starting from the ends and rolling up towards the scalp. Secure the flexi rod in place with a hair clip or bobby pin.
- Repeat this process with all sections of hair, using different sizes of flexi rods to create a variety of curl patterns.
- Leave the flexi rods in for several hours or overnight.
- Wrap a silk cloth on the head while sleeping to get a frizz-free look.
- Carefully remove the hair clips or bobby pins and unwind the hair from the flexi rods.
- Finger comb your curls to separate them and add volume.
Keep in mind that flexi rods may take longer to dry than other curling methods. Finally, be gentle when removing the flexi rods to avoid pulling or damaging your hair.
6. Twisted Bantu Knots
My personal favorite is the twisted Bantu knot. Just make sure to precisely section your hair and maintain uniformity while trusting your hair into buns. You will end up with non-frizzy loose curls. However, keep in mind that bantu knots may not work as well for shorter hair, as there may not be enough length to twist and coil.
For this method, you'll need:
- Hair ties or bobby pins
- Mousse or curl cream
- Hairspray
- Silk cloth
- Wash your hair with a high-volumizing shampoo.
- Pat dry your hair with a cotton towel for almost up to 80%.
- Now take a small section of hair and twist it tightly all the way to the ends resembling a rope.
- Coil the twisted hair around itself to form a knot at the scalp. Secure the knot in place with a hair tie or bobby pin.
- Repeat this process with all sections of hair, making sure to twist each section tightly to create defined curls.
- Leave the Bantu knots in for several hours or overnight. You might want to wear a silk cloth or a shower cap while sleeping to avoid any hair damage
- Carefully remove the hair ties or bobby pins and unravel the knots.
- Finger comb your curls to separate them and add volume.
7. Sock Curls

If you are looking for those gentle beachy waves, we got you covered. This sock curl technique gives you perfect wavy curly hair.
For this method, you will need:
- Clean sock
- Shower cap/silk cloth
- Light mouse or curling cream
- Start with clean, damp hair. Dry your hair up to 80%. Extremely wet hair may not hold the curls strong.
- Apply a styling product to help define the curls.
- Now take a sock and cut its toe section off while you make a ponytail using a hair tie.
- Once you make a ponytail, roll the sock into a donut shape and start rolling your hair around the sock starting from the tips towards the scalp.
- As you roll the entire section, pin it up with bobby pins.
- Leave the socks in for several hours or overnight.
- Carefully remove the hair ties or bobby pins and unroll the sock from your hair.
- Finger comb your curls to separate them and add volume.
8. Straw Curls

Save your coffee straws to get a tight curl for your next date. This technique works best for long hair wanting heat-free curls.
For this method, you will need:
- A pack of drinking straws (cut into 1/3rd)
- Hairpins
- Styling spray
- Hair ties.
- Wash your hair with a volumizing shampoo and air dry it up to 80%.
- Take a small section of hair and wrap it tightly around a drinking straw, starting at the ends and rolling up toward the scalp. Use a hair tie or bobby pin to secure the end of the hair to the straw.
- Repeat this process with all sections of hair, wrapping each section tightly around a straw to create defined curls.
- Leave the straws in for several hours or overnight by covering them with a silk cloth or a shower cap.
- Carefully remove the hair ties or bobby pins and gently slide the straws out of your hair.
- Avoid combing your hair in case you want tighter, bouncier, and stronger curls.
9. Curlformers

Curlformers may take some practice to use effectively, and the initial investment in them may be more expensive than other curling methods. However, they can create very defined curls and are gentle on the hair since they do not require heat. Choose the right size of curlformers for your hair length and thickness, and be gentle when removing them to avoid pulling or damaging your hair. Remember, though, that "the longer you wait, the sweeter the fruit gets".
For this method, you will need:
- A set of Curlformers in the desired size,
- Mousse or curl cream, or leave-in conditioner,
- A hook to help insert the Curlformers into your hair.
- Start with clean, damp hair. You may want to apply a leave-in conditioner for a smoother and shinier finish in the end.
- Take a section of hair and insert the hook (which comes with the set) into the base of the Curlformer, then hook the hair and pull the Curlformer through the hair.
- The hair should be pulled through the center of the Curlformer and out the other side.
- Repeat this process with all sections of hair, inserting the Curlformers in the desired pattern to create uniform curls.
- Leave the Curlformers in for several hours or overnight.
- Carefully remove the Curlformers by pulling them straight down and out of your hair.
- Finger comb your curls to separate them and add volume.
10. Pin Curls

Classics could never go out of fashion. The technique is often used to create vintage hairstyles, but it can also be used to add volume and texture to modern styles. It is a versatile technique that can be used on all hair types, although those with longer hair may find it more time-consuming.
This classic method uses bobby pins to create defined curls with lots of volumes. You'll need:
- bobby pins
- Styling products such as mousse or gel
- Wide hair comb.
- Start with clean, damp hair. It's best to wash and condition your hair beforehand, and then gently towel-dry it to remove excess water.
- Divide your hair into small sections. The size of each section will depend on how tight you want your curls to be. The smaller the sections, the tighter your curls will be.
- Apply a styling product to each section. You can use a mousse, gel, or curl-defining cream, depending on your hair type and personal preference. Be sure to distribute the product evenly throughout each section.
- Take a small section and twist it tightly. Hold the twist taut with one hand.
- Use the other hand to wrap the twisted section around your finger, creating a small coil. Be sure to keep the coil tight and close to your scalp.
- Once the coil is formed, use a bobby pin to secure it in place. Place the pin perpendicular to the coil, so that it forms an "X" shape. This will help keep the coil in place as it dries.
- Repeat the steps for each section of hair. Make sure that the coils are all going in the same direction, either clockwise or counterclockwise.
- Once all of your hair is pinned up, allow it to air dry completely.
- Use your fingers to gently separate and fluff the curls.
- Finish with a light-hold hairspray or hair oil/hair serum to help set the curls and add shine.
And there you have it – natural-looking curls without the use of heat styling tools!
11. Twisted Buns

The twisted bun can be created in different variations, including a high or low bun, a messy bun, or a braided bun. This method is versatile and can be adapted to different hair lengths and textures.
One of the benefits of the twisted bun method is that it is a quick and easy hairstyle that can be done at home without professional help. Additionally, it is a great option if you want hair out of your face and neck in hot summers.
One of the easiest of all for a quick beachy wavy look. You'll need:
- Hair tie
- Styling products such as mousse or sea salt spray
- A wide tooth-comb.
- Start with perfectly washed hair that is towel dried to its maximum.
- Part your hair down the middle and separate it into two sections.
- Take one section of hair and twist it tightly all the way down to the ends.
- Coil the twisted section of hair around itself to create a bun at the nape of your neck, and secure it in place with a hair tie.
- Repeat the twisting and coiling process with the other section of hair.
- Allow your hair to dry completely, either naturally or with a hair dryer on a low setting.
- Once your hair is dry, carefully remove the hair ties and gently finger-comb your waves.
- Finish with a light-hold hairspray to set the waves in place.
12. Scrunchie Curls

This one requires just a scrunchie and a few bobby pins. Twist your hair into the scrunchie and there you have perfect beachy curls. This one works best if you have long hair. This method is a great way to achieve natural-looking curls with minimal effort.
This method is a great way to achieve natural-looking curls with minimal effort.
You'll need:
- A scrunchie
- Mousse or gel
- Post-hair wash, towel dry your hair. Avoid rubbing as it may lead to frizzy curly hair.
- Tie your hair into a high little loose ponytail.
- Now start turning your hair around the scrunchy as you skipped the last tie.
- Keep repeating until you fully wrap the scrunchie and almost look like a bun.
- Let it sit overnight or at least for 6-7 hours.
- Loosen and finger-comb your hair to get a gorgeous wavy salon-like look.
13. Paper Towel Curls

The paper towel curls work best on slightly damp hair, so avoid using too much water to prevent your hair from getting too wet. Additionally, using too much styling product can weigh down your curls, so be sure to use only a small amount.
Paper towel curls are an easy and inexpensive way to curl hair without heat. For this method, you will need:
- Paper towels
- Water
- Hair styling products such as mousse, gel, or curling cream.
- First, start by dampening your hair with water.
- Next, apply your styling product to your hair to help hold the curl.
- Then, take a paper towel and fold it in half, lengthwise. Place a section of your hair at the end of the paper towel and begin rolling it up tightly toward your scalp.
- Tie the ends of the paper together to secure the curl in place.
- Repeat with the remaining sections of hair.
- Leave the paper towels in your hair for at least a few hours or overnight to allow the curls to set. Once you're ready to take the paper towels out, gently unravel each one and let the curls fall naturally.
14. Sea Salt Curls

It’s a low-maintenance, effortless curling method. All you need is water with sea salt in it. Spray the water while continuously curling your hair with your fingers. You will achieve a relaxed look without having to spend much time. It can be customized to suit different hair lengths and textures, and it works well on both straight and curly hair.
For this method, you will need:
- A spray bottle
- Water
- Sea salt
- A hair styling product such as mousse or gel.
- To create the sea salt spray, mix one tablespoon of sea salt with one cup of warm water in a spray bottle. Shake the bottle until the sea salt is dissolved.
- Next, dampen your hair with the sea salt spray and apply your styling product to help hold the curls. Use your fingers to scrunch and twist your hair into sections, creating loose curls or waves.
- Allow your hair to air dry.
- Once your hair is dry, gently tousle your curls to loosen them up and create a more natural look.
It's important to keep in mind that using too much sea salt spray can dry out your hair, so be sure to use it sparingly. This method may work better on hair that already has some natural wave or texture.
15. Traditional Curler

Well, granny’s old tricks never fail. Grandmas were very clever to get the style done without damaging their hair. This one is the most old school of all, being the easiest one too. You will need:
- Hair curler
- Hairpin
- Mousse or curling gel
- Pick the curler of your choice, depending on the tightness of the curls you want.
- Section the hair into 6-8 equal parts.
- Take a section and start rolling hair around the curler towards your scalp.
- Secure the curler with a lock or a hairpin.
- Keep the curler for a few hours while spraying with hair mousse or hair setting spray.
- This can not be an overnight trick to work on so it is not recommended to sleep with the curlers on.
Conclusion:
Curling your hair with heating tools like a curling iron, flat rod, and blow dryers gives your hair a bounce along with shiny curls. But, when used in the long run, it adds to frizzy, dry, and damaged hair (2).
Natural ways to curl your hair without heat by using techniques like braiding, twisting, and using flexi rods, provide an easy and effective solution. Additionally, nourishing your hair with natural oils like coconut, castor, and mustard oil can help promote healthy hair growth; while maintaining your beautiful and bouncy curls. By incorporating these natural methods into your hair care routine, you can achieve your desired curls without compromising your hair's health. So go ahead, and try these natural heat-less methods to curl your hair and experience the benefits of healthy, effortless, and beautiful curls.
Sources:
1. The what, why and how of curly hair: a review


 JOIN OUR WHATSAPP CHANNEL


